Showing posts with label inkAID. Show all posts

Sunday, October 5, 2014

Digital Transfers in 3D Spaces


This video tutorial takes a look at my process using Transferiez on 3D surfaces. Depicted in the video are transfers onto steel sculpture. The steel used is 20 gauge cut into freestyle shapes with a plasma cutter, formed by using a vice and other metal techniques. Joined by rivets. This tutorial is not about forming the metals but about applying transfers to the surfaces. This technique is possible to use on many 3D Surfaces, not just metal.

The sculpture used in the video is at the early stage of being constructed. Once all the surfaces have been finished other 3D elements and wires will be added.

To purchase this tutorial for $9.95 click here.

These are photos of the works in progress from this video workshop.

Material for the base of the sculpture is 20 gauge steel. Digital Transfers with Gilders Paste in areas make up the color and image portion. 
Some digital transfers on aluminum have been added to the surfaces in places.

To be added are more transfers and other elements and wire configurations. When they are finished, the final images will be posted here.


Friday, September 27, 2013

Preparing and Digitally Printing Lightweight Metal


Exploring digital printing on different types of metals inspires me. Beverage cans have long been my metal of choice and are used in many of my art assemblages. Printing plates are another enjoyable surface to print digitally. The subject of this workshop will be other types of lightweight metals in the 36 gauge range. Copper, brass and aluminum in 36 gauge are really quite nice to print and then work with after printing. Their pliable characteristic adds to my interest for investigating possibilities after they have been printed. 

This is Part One of a Two part workshop. The first part is about preparing the metal and ideas on image selection. The second part is the print process and all the particulars.

KathyAnne Art members log in and go to this url to access the workshop for free.

Non members to purchase this workshop for $9.95 click here. You will receive your pdf by email within 24 hours of purchasing.

Wednesday, November 11, 2009

Photoshop and Printing Ideas

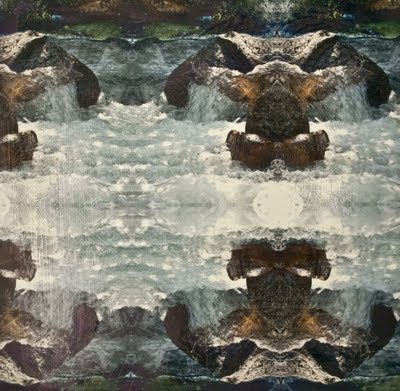
My new "Surfaces" book is in the works and one of the printing ideas from the book comes from an image on the KathyAnne Art site.  Tessellation 10 from the Yosemite collection was chosen for a print on watercolor paper.  The paper has a pattern created with Golden's Molding Paste. The paste was applied and  scraped, with a cut piece of hardware cloth. Once dry, the paper was coated with Type ll precoat from inkAID.

Using Tesselation 10, I changed the image by doing the following.  This can be done with both Photoshop and Photoshop Elements.


After downloading this image from the KathyAnne Art site, I changed the canvas size to twice the height so that I could copy the image, flip it vertically to come up with my final image to print.
So that you could clearly see the papers texture once printed, I was looking for an image that would show that once printed and photographed.


This is the final print.


The detail will show the texture from the paper.

My new "Surfaces" book will include canvas, pimatex cotton, some papers, lutradur, organdy, silk and tyvek.  The books focus is about my experiences and ideas when I digitally print these surfaces.  Off to the library today to finish the chapter on tyvek and hopefully canvas.  The ebook should be available later this month.  This will be the first book in a series that will start with books covering the topics of surfaces, texture and easy printing on the road for journaling.

Visit KathyAnne Art for tutorials and workshops.